Introduction #
Flat slab can be defined as a two way RC Slab which is not supported by any beams. The slab loads are predominantly directly transferred to the supporting columns.
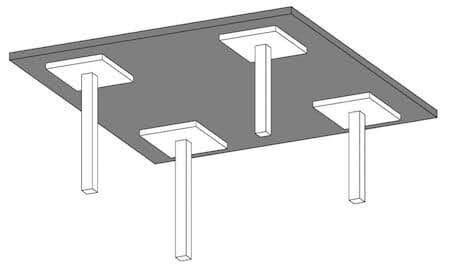


Figure 1: Typical flat slab with column thickenings (source: structuralguide.com)
Among the advantages of using flat slab is that it offers flexibility in the design layout which gives more floor space for the designer to work with. Reinforcement placement is also simpler in flat slabs as opposed to conventional slabs. Among other advantages of using a flat slab is ease of framework installation, enables lower building height and saves construction time.
In MiLA Structure, flat slab includes the addition of column thickenings and column strips. This is to allow the slab to withstand more loads. Column thickenings, also known as column heads, helps to increase the shear strength of the slab. Besides that, it also reduces the effective span length, which in turn reduces the moment formed in the slab.
Input Flat Slab in MiLA Structure #
To input flat slab in MiLA Structure, follow the steps provided below:
- Add columns
- Click on ‘Slab’ and draw out the perimeter of the flat slab
Figure 2: Inputting slab
3. Click on the ‘Column Thickening’ icon
4. Click on ‘Batch Add on Column’ to add column thickening on all columns

Figure 3: Batch adding column thickening
5. Alternatively, click individually on the columns in the keyplan to apply column thickenings
6. To input column strips, click on ‘Column Strip’ icon
7. Click on any one column and drag the strip to another column
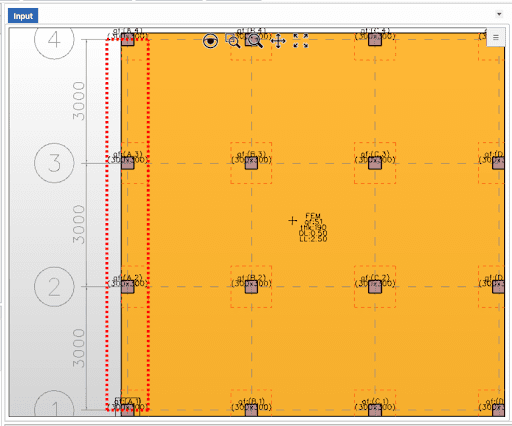
Figure 4: Inputting column strip on flat slab
Note that column strips can only be added in parallel or perpendicular to the columns.
Middle strips can also be added by clicking on ‘Middle Strip’ and inputting the strip between two columns.

Figure 5: Flat Slab modelling in MiLA Structure
Editing Column Thickenings and Column Strips #
To edit the column thickenings, click on the column thickening on keyplan. Then, changes to the label, width, height and thickening size can be made in the properties tab.
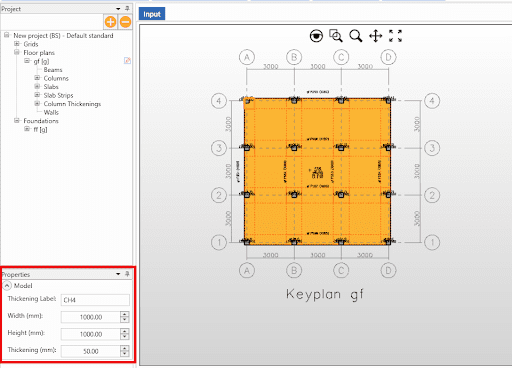
Figure 6: Editing column thickenings
Similarly, column strip label and width can be edited in the properties tab.
Design & Analysis of Flat Slab Strips #
To analyze and design the flat slab strip, click on ‘Run Analysis’. Then, in the Analysis/Design tab, click on ‘Slab Strip’.
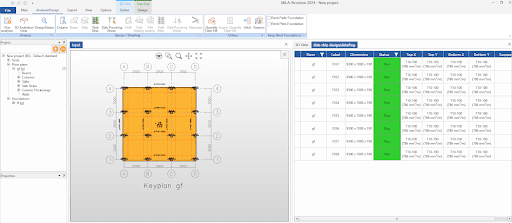
Figure 7: Slab strip design and detailing tab
In this tab, the status of the design will be shown, together with the top and bottom reinforcements of the flat slab. To change the type of reinforcement used, click on ‘Design Slab Strip’ icon and to bring out the Editor Window. Changes can be made in this pop up window.

Figure 8: Design Slab Strip window
To view the output in a report format, click the ‘Simplified Report’ icon. To view the moment and shear diagrams, click on ‘Analysis Diagram’.
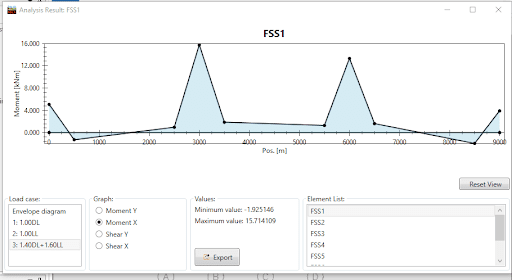
Figure 9: Bending moment diagram for a slab strip
Column Head Design #
The column head design or the slab punching shear design can be viewed by clicking on ‘Slab Punching Shear’ in the Analysis/Design tab. The status of the column head is displayed in the design tab. To view the report, click on ‘Simplified Report’.

Figure 10: Column Head Design Tab
Tags
MiLA Structure, flat slab, column strip, column head, column thickening, punching shear, flat slab analysis, RC Slabs